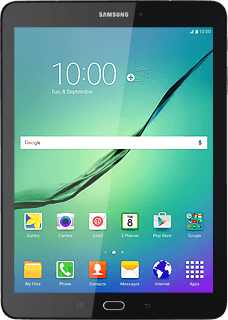
Samsung Galaxy Tab S2 9.7
Set up your tablet for email
You can set up your tablet to send and receive email from your email accounts. Remember, you need to set up your tablet for internet.
Select an alternative email configuration:
- Set up your tablet for Telstra Mail
- Set up your tablet for Exchange email
-
1Find "Email"
- Press Apps.
- Press Email.
-
2Enter email address
- Key in your email address.
-
If an email account has been created already, do the following instead:Press MORE. Press Settings. Press Add account. Key in your email address.
-
3Enter password
- Press Password and key in the password for your email account.
- Press NEXT.
-
If the display tells you that your email account has been set up, follow the instructions on the display to select more settings and finish the setup.
-
4Select server type
- Press POP3 ACCOUNT.
-
5Enter username
- Press the field below "User name" and key in the username for your email account.
-
6Enter incoming server
- Press the field below "POP3 server" and key in the name of your email provider's incoming server.
-
7Turn off encryption of incoming email
- Press the drop down list below "Security type".
- Press None.
-
8Enter incoming port
- Press the field below "Port" and key in 110
-
9Turn deletion of email on server on or off
- Press the drop down list below "Delete email from server".
- Press Never or When deleted from Inbox.
- Press NEXT.
-
10Enter outgoing server
- Press the field below "SMTP server" and key in the name of your email provider's outgoing server.
-
11Turn off encryption of outgoing email
- Press the drop down list below "Security type".
- Press None.
-
12Enter outgoing port
- Press the field below "Port" and key in 25
-
13Turn on SMTP authentication
- Press Require sign-in until the display tells you that the function is turned on.
- Press the field below "User name" and key in your username for your email provider's outgoing server.
- Press the field below "Password" and key in your password for your email provider's outgoing server.
- Press NEXT.
-
14Enter email account name
- Press MORE.
- Press Settings.
- Press the name of the required account.
- Press Account name.
- Key in the name and press OK.
-
15Enter sender name
- Press Your name.
- Key in the required sender name and press OK.
-
16Select settings for retrieval of new email
- Press Sync schedule.
- Press Set sync schedule.
- Press Manual or the required period.
- Press the Return key twice.
-
17Turn email notification on or off
- Press Notifications.
- Press the name of your email account.
- Press the indicator below the name of your email acount to turn the function on or off.
-
18Finish setup
- Press the Return key the necessary number of times.
-
19Return to the home screen
- Press the Home key to return to the home screen.
