Browse via device topic
Help & support guides for your Apple iPhone 6
I can't send and receive email
If you can't send and receive email, there may be several causes of the problem.
To send and receive email using POP3, your phone needs to be correctly set up for email.
Solution: Set up your phone for POP3 email
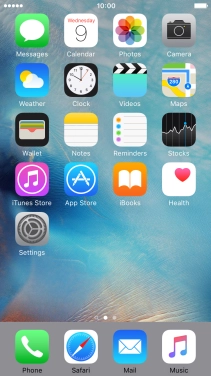
Press Settings.

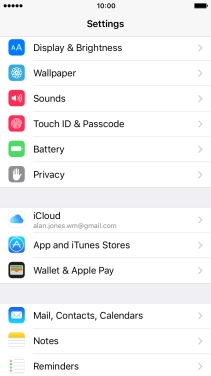
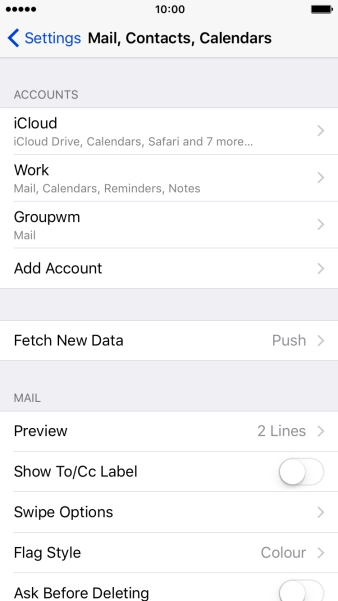
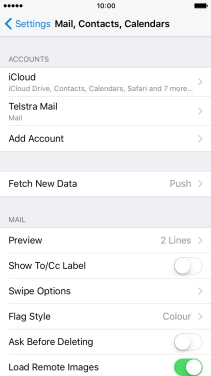
Press Mail, Contacts, Calendars.
Press Add Account.

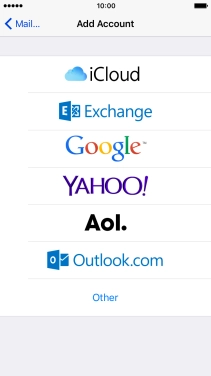
Press Other.
If the name of your email provider is on the list, press this instead.
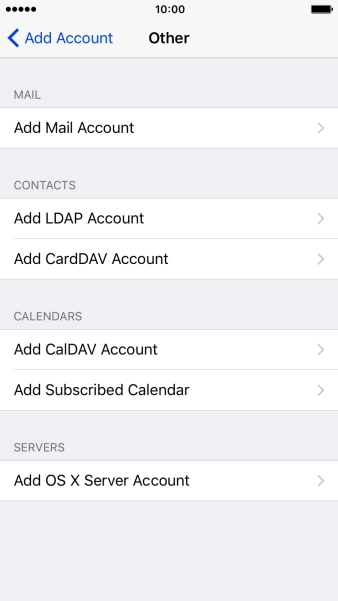

Press Add Mail Account.
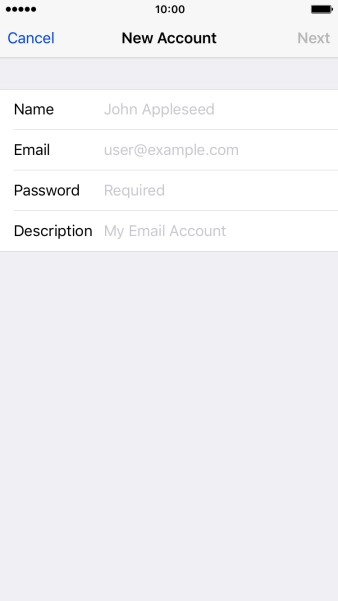
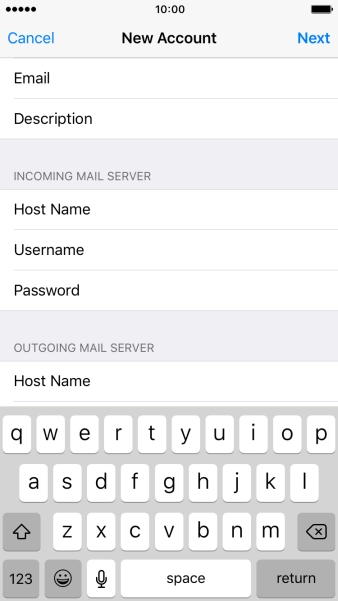
Press Name and key in the required sender name.

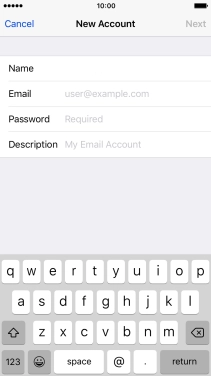
Press Email and key in your email address.

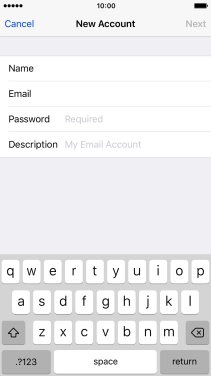
Press Password and key in the password for your email account.

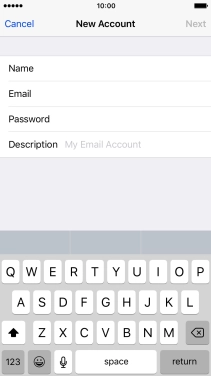
Press Description and key in the password for your email account.

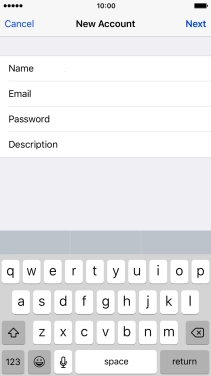
Press Next.

If this screen is displayed, you email account has been recognised and set up automatically. Follow the instructions on the screen to key in more information and finish setting up your phone.
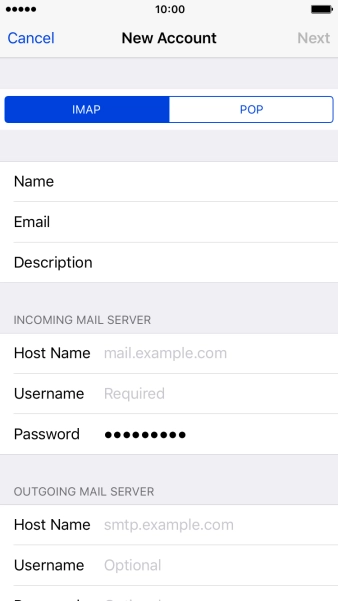

Press POP.
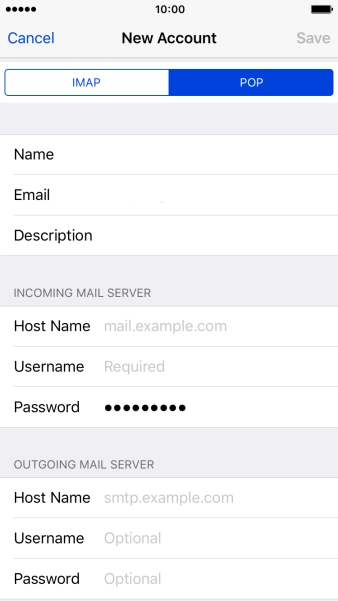

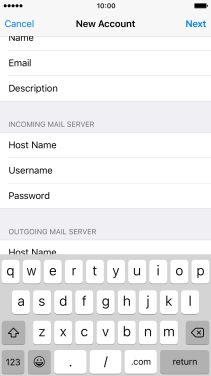
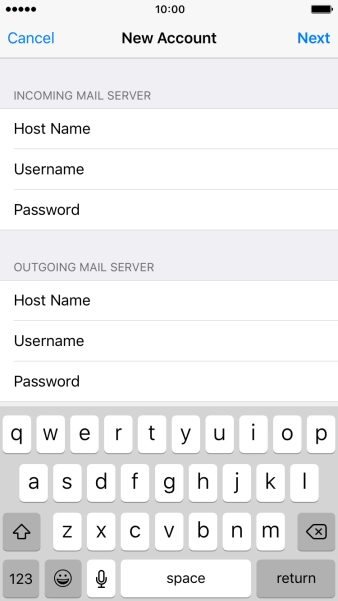
Press Host Name and key in the name your email provider's incoming server.

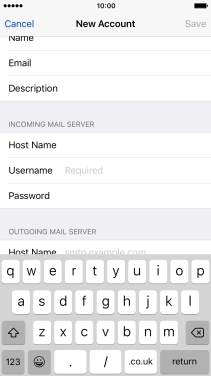
Press Username and key in the username for your email account.


Press Host Name and key in the name of your email provider's outgoing server.
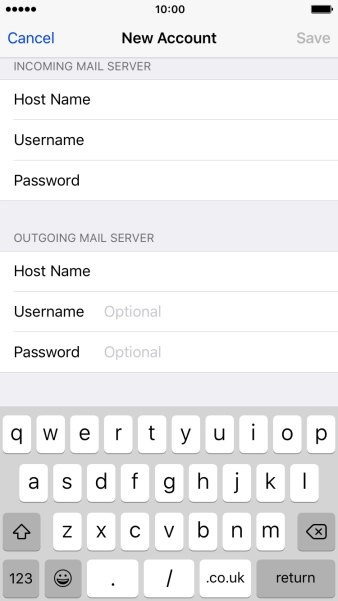
Press Username and key in the username for your email account.
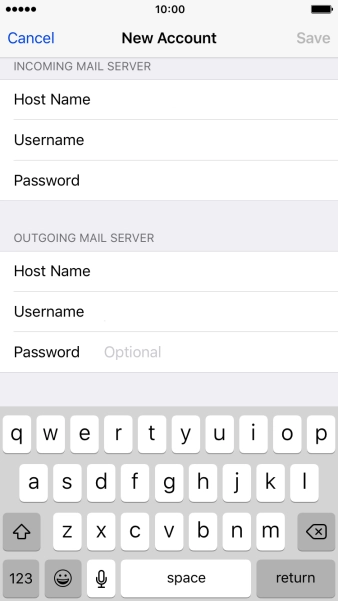
Press Password and key in the password for your email account.

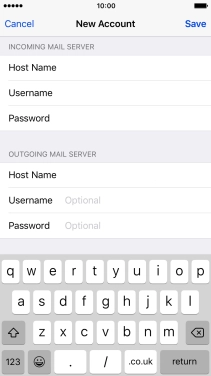
Press Save.
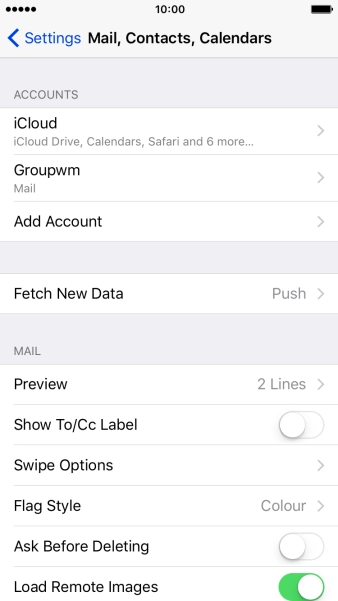
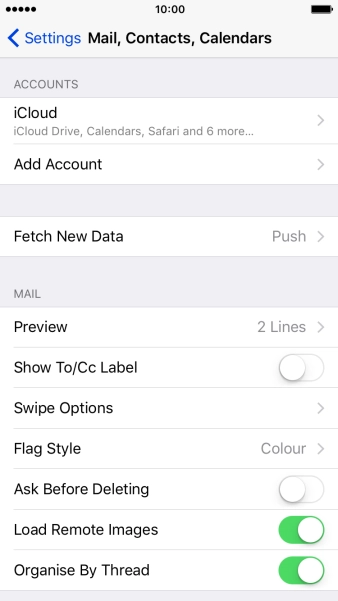
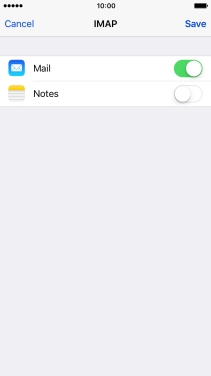
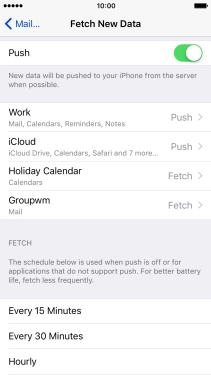
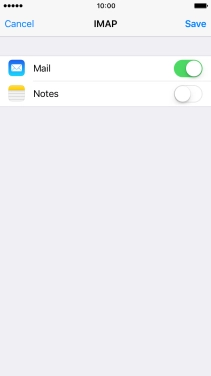
Press Fetch New Data.
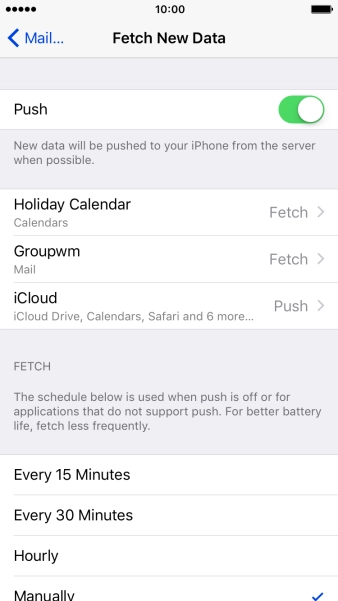
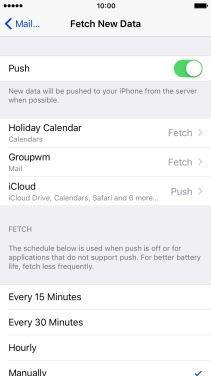
Press the indicator next to "Push" to turn the function on or off.
If you turn off the function, press the required setting.
Press Mail....
Press the Home key to return to the home screen.
Step 1 of -
Step 1 of -
To send and receive email using Exchange, your phone needs to be correctly set up for Exchange email.
Solution: Set up your phone for Exchange email
Press Settings.
Press Mail, Contacts, Calendars.
Press Add Account.
Press Exchange.

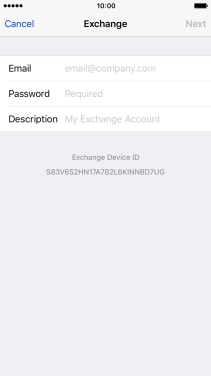
Press Email and key in your email address.

Press Password and key in the password for your email account.
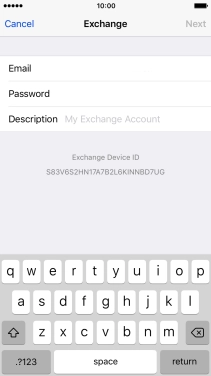
Press Description and key in the required name.


Press Next.


If this screen is displayed, you email account has been recognised and set up automatically. Follow the instructions on the screen to key in more information and finish setting up your phone.

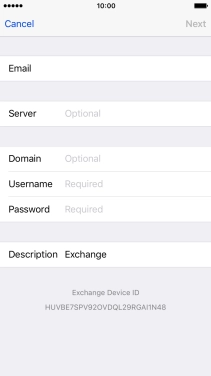
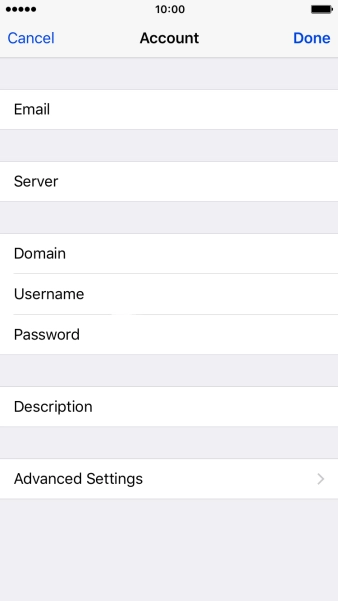
Press Server and key in the server address.

Press Domain and key in the domain.

Press Username and key in the username.

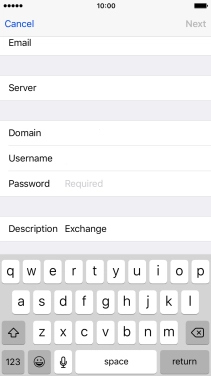
Press Password and key in the password for your email account.

Press Next.
Press the indicator next to the required data type to turn synchronisation on or off.
Press Save.

Press the name of the Exchange email account you've just set up.
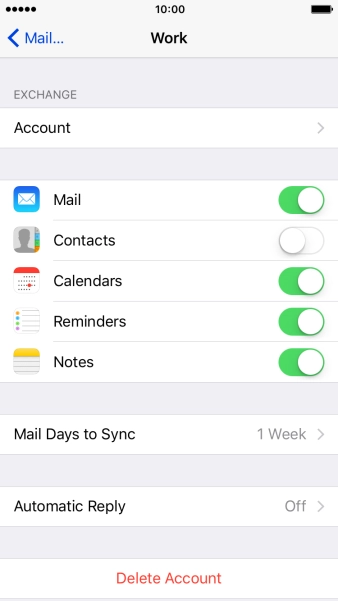

Press Account.
Press Advanced Settings.

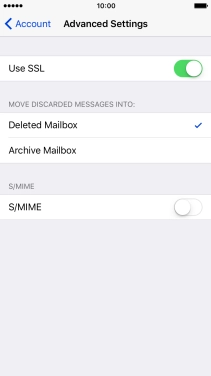
Press the indicator next to "Use SSL" to turn the function on or off.
Press Account.
Press Done.
Press Fetch New Data.

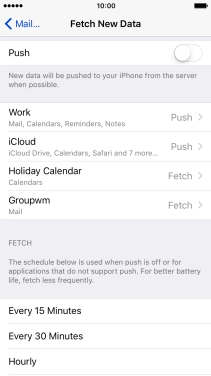
Press the indicator next to "Push" to turn the function on or off.

If you turn off the function, press the required setting.
Press Mail....
Press the Home key to return to the home screen.
Step 1 of -
Step 1 of -
To send an email, it needs to be written and sent correctly.
Solution: Write and send email
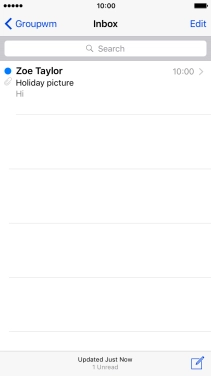
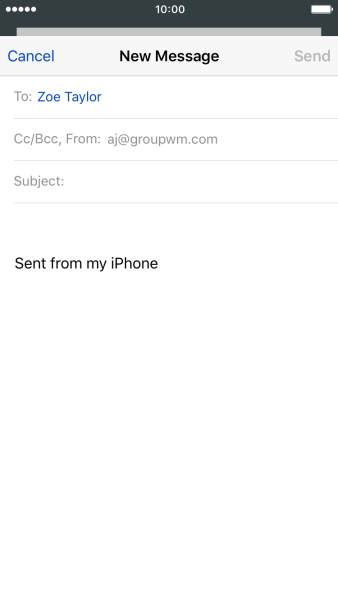
Press Mail.

Press the name of the email account.

Press the required email account.
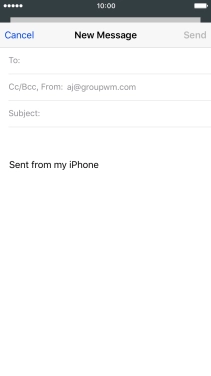
Press the new email icon.

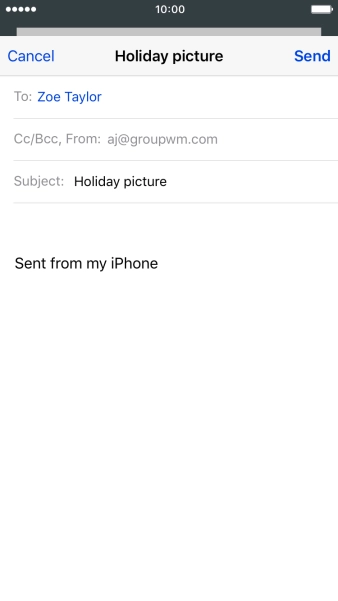
Press To and key in the first letters of the recipient's name.
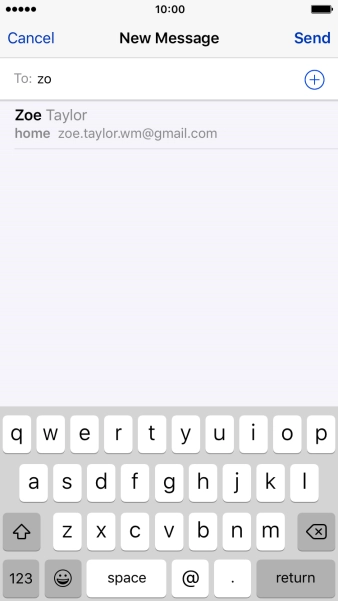
Press the required contact.

Press Subject and key in the required subject.

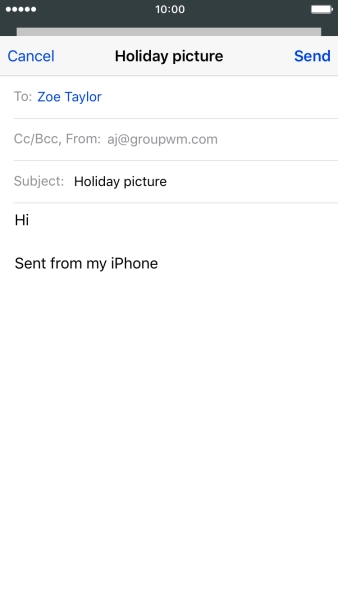
Press the text input field and write the text for your email.

Press and hold the text input field until a pop-up menu is displayed.
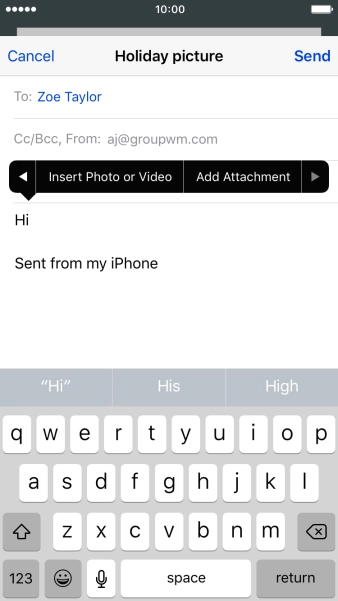

Press Insert Photo or Video and go to the required folder.

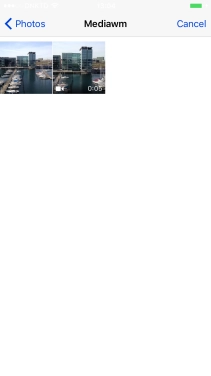
Press the required picture or video clip.


Press Choose.

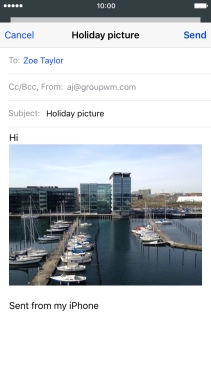
Press Send when you've finished your email.

Press the Home key to return to the home screen.
Step 1 of -
Step 1 of -
To send and receive email, your phone needs to be correctly set up for Telstra Mail.
Solution: Set up your phone for Telstra Mail
Press Settings.
Press Mail, Contacts, Calendars.
Press Add Account.
Press Other.
Press Add Mail Account.
Press Name and key in the required sender name.
Press Email and key in your Telstra email address.
E.g. user@bigpond.com, user@bigpond.net.au or user@telstra.com.
Press Password and key in your Telstra email address.
Press Description and key in the required name.
Press Next.
Press IMAP.
Press Host name and key in imap.telstra.com.

Press Username and key in the username for your Telstra email account.
The username for your Telstra email account is your email address, e.g. user@bigpond.com, user@bigpond.net.au or user@telstra.com.

Press Host name and key in smtp.telstra.com.
Press Username and key in the username for your Telstra email account.
The username for your Telstra email account is your email address, e.g. user@bigpond.com, user@bigpond.net.au or user@telstra.com.
Press Password and key in the password for your Telstra email account.

Press Next.

Press Save.

Press the name of the Telstra email account you've just set up.
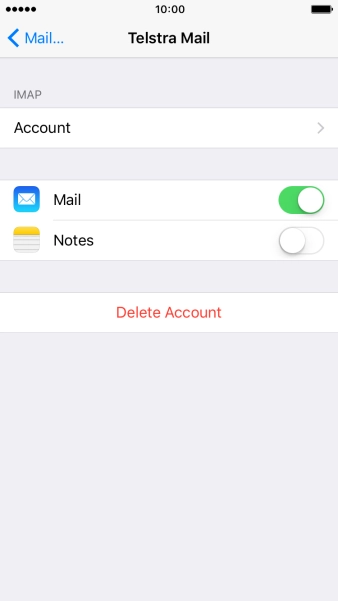
Press the required email account.


Press SMTP.

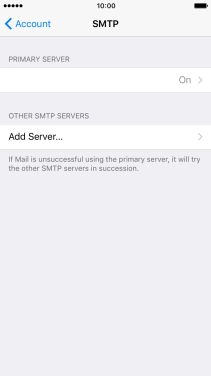
Press the field below "PRIMARY SERVER".
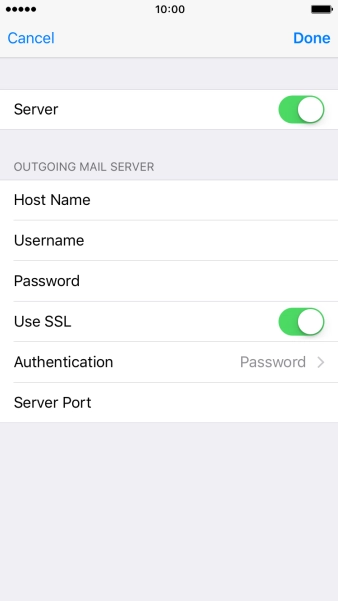
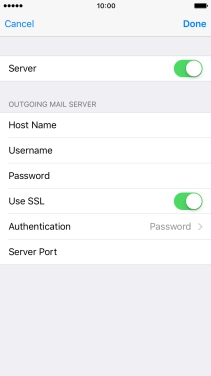
Press the indicator next to "Use SSL" to turn on the function.
Press Server Port and key in 465.
Press Done.
Press Account.
Press Advanced.
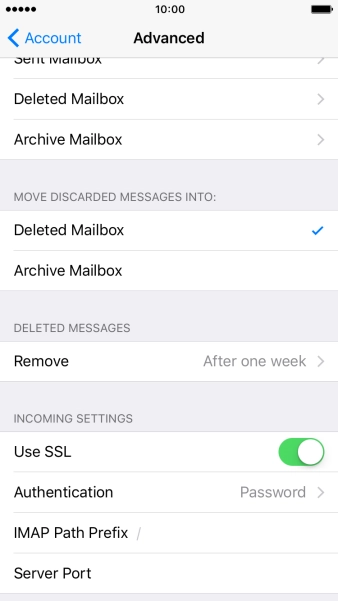

Press Use SSL to turn on the function.
Press Server Port and key in 993.
Press Account.
Press the Home key to return to the home screen.
Step 1 of -
Step 1 of -