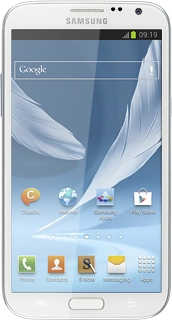
Samsung Galaxy Note II
Choose another device
Quick links to popular guides
Browse via device topic
Help & support guides for your Samsung Galaxy Note II
I can't send and receive picture messages
If you can't send and receive picture messages, there may be several causes of the problem.
Solution: Write and send picture messages
Press Apps.
Press Messaging.
Press the new message icon.


Key in the first letters of the required contact.


Matching contacts are displayed.
Press the required contact.
Press the text input field.


Write the text for your picture message.
Press the attachment icon.


Select one of the following options:


Insert picture, go to 4a.


Insert video clip, go to 4b.


Insert audio file, go to 4c.
Press Images.


Go to the required folder.
Press the required picture.
Press Video.


Go to the required folder.
Press the required video clip.
Press Audio.


Go to the required folder.
Press the field next to the required audio file.
Press Done.
Press the send icon when you've finished your picture message.
Press the Home key to return to standby mode.
Step 1 of -
Step 1 of -
Solution: Turn data roaming on or off
Press Apps.
Press Settings.
Press More settings.
Press Mobile networks.
Press Data roaming to turn the function on or off.
Press OK, if required.
When the box next to the menu item is ticked (V), the function is turned on.
Press the Home key to return to standby mode.
Step 1 of -
Step 1 of -
Solution: Write and send picture messages
Press Apps.
Press Messaging.
Press the new message icon.


Key in the first letters of the required contact.


Matching contacts are displayed.
Press the required contact.
Press the text input field.


Write the text for your picture message.
Press the attachment icon.


Select one of the following options:


Insert picture, go to 4a.


Insert video clip, go to 4b.


Insert audio file, go to 4c.
Press Images.


Go to the required folder.
Press the required picture.
Press Video.


Go to the required folder.
Press the required video clip.
Press Audio.


Go to the required folder.
Press the field next to the required audio file.
Press Done.
Press the send icon when you've finished your picture message.
Press the Home key to return to standby mode.
Step 1 of -
Step 1 of -
Solution: Activate or deactivate data connections
Press Apps.
Press Settings.
Press More settings.
Press Mobile networks.
Press Mobile data to activate or deactivate the function.
When the box next to the menu item is ticked (V), the function is turned on.
Press the Home key to return to standby mode.
Step 1 of -
Step 1 of -
Solution: Set up your phone for picture messaging
Press Apps.
Press Settings.
Press More settings.
Press Mobile networks.
Press Access Point Names.
Press the Menu key.
Press New APN.
Press Name.
Key in Telstra MMS and press OK.
Press APN.
Key in telstra.mms and press OK.
Press MMSC.
Key in http://mmsc.telstra.com:8002 and press OK.
Press MMS proxy.
Key in 10.1.1.180 and press OK.
Press MMS port.
Key in 80 and press OK.
Press MCC.
Key in 505 and press OK.
Press MNC.
Key in 01 and press OK.
Press Authentication type.
Press None.
Press APN type.
Press MMS.
Press the Menu key.
Press Save.
Press the Home key to return to standby mode.
Press Apps.
Press Messaging.
Press the Menu key.
Press Settings.
Press Delivery reports below Multimedia message (MMS) settings to turn the function on or off.
When the box next to the menu item is ticked (V), the function is turned on.
Press Auto-retrieve to turn on the function.
When the box next to the menu item is ticked (V), the function is turned on.
Press Roaming auto-retrieve to turn off the function.
When the box next to the menu item is empty, the function is turned off.
Press the Home key to return to standby mode.
Step 1 of -
Step 1 of -