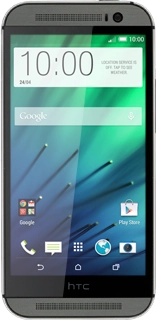
HTC One (M8)
Choose another device
Browse via device topic
Help & support guides for your HTC One (M8)
I can't send and receive email
If you can't send and receive email, there may be several causes of the problem.
Solution: Contact your email provider for the correct settings for the incoming or outgoing server.
Solution: Write and send email
Press the menu icon.
Press Mail.
Press the name of the email account.
Press the required email account.
Press the new email icon.


Key in the first letters of the required contact.


Matching contacts are displayed.
Press the required contact.


Repeat the procedure to add more recipients.
Press Subject and key in a subject for the email.
Press the text input field and write the required text.
Press the attachment icon.
Press


Go to the required folder.
Press the required file.


Follow the instructions on the display to attach the file.
Press the send icon when you've finished your email.
Press the home icon to return to the home screen.
Step 1 of -
Step 1 of -
Solution: Set up your phone for email
Press the menu icon.
Press Mail.
Press the required provider or Other (POP3/IMAP).


Key in your email address.
Press Password and key in the password for your email account.
Press NEXT.
Press the field below "PROTOCOL".
Press POP.


Key in the username for your email account.
Press the field below "POP SERVER" and key in the name or the IP address of your email provider's incoming server.
Press the field below "SECURITY TYPE".
Press None.
Press the field below "SERVER PORT" and key in 110
Press NEXT.
Press Login required to turn the function on or off.


If you turn on SMTP authentication:
Press the field below "USERNAME" and key in your username for your email provider's outgoing server.
Press the field below "PASSWORD" and key in your password for your email provider's outgoing server.
Press the field below "SMTP SERVER" and key in the name or IP address of your email provider's outgoing server.
Press the field below "SECURITY TYPE".
Press None.
Press the field below "SERVER PORT" and key in 25
Press NEXT.


Key in a name for your email account.
Press the field below "YOUR NAME" and key in the required sender name.
Press FINISH SETUP.


Wait while your phone retrieves new email.
Press the menu icon.
Press Settings.
Press Sync, Send & Receive.
Press Peak time sync.
Press Smart Sync, Manual or the required interval.
Press Off-peak sync.
Press Smart Sync, Manual or the required interval.
Press Download options.
Press the required setting.
Press the return icon several times to return to the inbox.
Press the home icon to return to the home screen.
Step 1 of -
Step 1 of -
Solution: Set up your phone for Exchange email
Press the menu icon.
Press Mail.
Press Microsoft Exchange ActiveSync.


Key in your email address.
Press Password and key in your password.
Press MANUAL SETUP.
Press the field below "SERVER ADDRESS" and key in the server address.
Press the field below "DOMAIN" and key in the domain name.
Press the field below "USERNAME" and key in your username.
Press This server requires an encrypted SSL connection to turn the function on or off.
Press NEXT.


Press the following data types to turn synchronisation on or off:
Contacts
Calendar
Tasks
Press the required setting below "PEAK HOUR UPDATE SCHEDULE".
Press NEXT.


Key in a name for your email account.
Press FINISH SETUP.
Press the home icon to return to the home screen.
Step 1 of -
Step 1 of -
Solution: Set up your phone for Telstra Mail
Press the menu icon.
Press Mail.
Press Other (POP3/IMAP).


Key in your Telstra email address.
Press Password and key in the password for your Telstra email account.
Press MANUAL SETUP.
Press the field below "PROTOCOL".
Press IMAP.


Key in the username for your Telstra email account.
Press the field below "IMAP SERVER" and key in imap.telstra.com
Press the field below "SECURITY TYPE".
Press SSL (accept all certificates).
Press the field below "SERVER PORT" and key in 993
Press NEXT.
Press Login required to turn on the function.


Key in the username for your Telstra email account.
Press the field below "PASSWORD" and key in the password for your Telstra email account.
Press the field below "SMTP SERVER" and key in smtp.telstra.com
Press the field below "SECURITY TYPE".
Press SSL (accept all certificates).
Press the field below "SERVER PORT" and key in 465
Press NEXT.


Key in a name for your email account
Press the field below "YOUR NAME" and key in the required sender name.
Press FINISH SETUP.


Wait while your phone retrieves new email.
Press the menu icon.
Press SETTINGS.
Press Sync, Send & Receive.
Press Peak time sync.
Press Smart Sync, Manual or the required interval.
Press Off-peak sync.
Press Smart Sync, Manual or the required interval.
Press Download options.
Press the required setting.
Press the return icon several times to return to the inbox.
Press the home icon to return to the home screen.
Step 1 of -
Step 1 of -