Set up your phone for Exchange email

You can set up your phone to send and receive email from your Exchange email account, such as your work email. Remember, you need to set up your phone for internet.

Select an alternative email configuration:
- Set up your phone for email
- Set up your phone for Telstra Mail

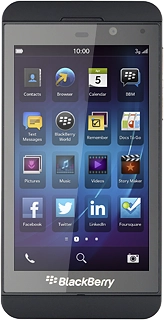
BlackBerry Z10
BlackBerry Z10
BlackBerry Z10
BlackBerry Z10
BlackBerry Z10
BlackBerry Z10
BlackBerry Z10
BlackBerry Z10
  • 1
    Find "APN"
    • Slide your finger down the display starting from the top edge of your phone.
    • Press Settings.
    • Press Network Connections.
    • Press Mobile Network.
    • Press APN.
  • 2
    Enter APN
    • Press the field below Access Point Name (APN) and key in telstra.wap
  • 3
    Save data connection
    • Press Save.
    • Press Back.
    • Press Back.
    • Slide your finger up the display starting from the bottom edge of your phone to return to standby mode.
  • 4
    Find "Accounts"
    • Slide your finger down the display starting from the top edge of your phone.
    • Press Settings.
    • Press Accounts.
  • 5
    Create email account
    • If you've already set up an email account:
    • Press Add Account.
    • Press Advanced.
  • 6
    Select account type
    • Press Microsoft® Exchange ActiveSync.
  • 7
    Enter email account name
    • Key in a name for the email account.
  • 8
    Enter domain
    • Press the field below Domain and key in the domain.
  • 9
    Enter username
    • Press the field below Username and key in your username.
  • 10
    Enter email address
    • Press the field below Email Address and key in your email address.
  • 11
    Enter password
    • Press the field below Password and key in the password for the server.
  • 12
    Enter server name
    • Press the field below Server Address and key in the server name.
  • 13
    Enter port
    • Press the field below Port and key in the required port number.
  • 14
    Turn SSL encryption on or off
    • Press the indicator next to Use SSL to turn SSL encryption on or off.
  • 15
    Select setting for synchronisation
    • Press the indicator next to Push to turn the function on or off.
    • If you turn off Push:
    • Press the field below Sync Interval.
    • Press the required period or Manual.
    • Please note: Each time your phone connects to the server to synchronise, data charges will apply.
  • 16
    Select period for retrieving email
    • Press the field below Sync Timeframe.
    • Press the required period.
    • Press Next.
  • 17
    Select data types
    • Press the indicator next to the following data types to turn synchronisation of these data types on or off:
    • Sync Email
    • Sync Contacts
    • Sync Calendar
    • Sync Tasks
    • Sync Memos
  • 18
    Activate email account
    • Press Done.
    • Wait while the email account is activated.
  • 19
    Exit
    • Slide your finger up the display starting from the bottom edge of your phone to return to standby mode.